News
Ophelia Overalls Sew Along Part 3: Bibbity Bobbity February 16 2019
Click here for previous installment in the sew along.
Let’s jump right in and get the bib on these babies!
Make the Bib Pocket by turning back the top edge along the foldline (A) and stitching up the sides(B). Turn it right side out and then press in the seam allowance on all the remaining sides (D_E). Stitch top edge in place (F).

Finished Bib Pocket:

Before you start working on the Bib and manipulating it, stay stitch the curved edges right along the seam line So they won’t get stressed or distorted while you’re working. (The stay stitching is hard to see because the thread color matches the fabric.)

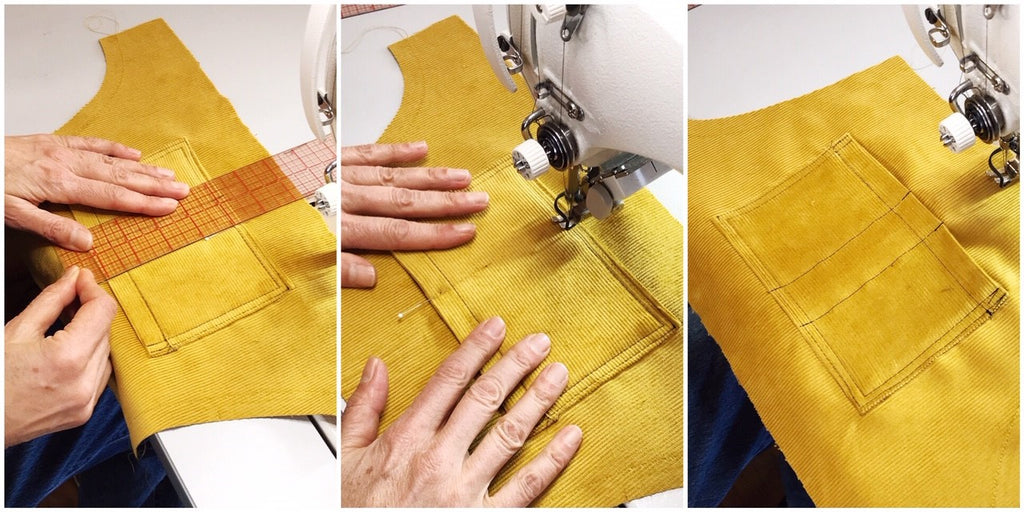
Mark the Bib Pocket placement lines on the Bib. We used an awl punch hole just inside of the placement lines so the Pocket covers the marks (a-c). Place the pocket on the bib and glue-baste or hand baste the pocket in place (d). We glue basted the Pocket and it did shift a tiny bit while we were stitching (hand basting it is always the best). Edge stitch and topstitch the pocket in place (e-f).

If you want, use stitching lines to divide the pocket into sections. A clear 2 inch ruler can be used to mark your stitching lines.

Next ,pin the Bib to the front edge of the waist, right sides together, matching center fronts and matching the notches to the princess seams (1). Stitch seam (2). Trim the seam allowance on the Bib only and press the seam towards the Bib (3-5). And edge stitch and topstitch the seam on the Bib (6).

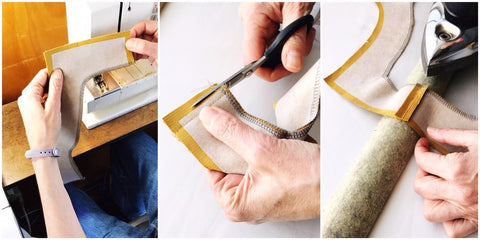
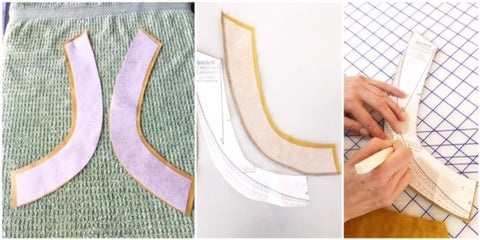
Now we’re going to use the facing to finish all the edges of the Bib and the front opening on the overalls. First, interface the Bib Facing pieces, trimming 3/8" off the notched edges and fusing to the corresponding bib facing pieces. Finish the inner and lower edges (right). We rounded the inner curves on the Bib Facing piece to make it easier to put through the serger.

Stitch the Bib Facing right sides together at the center front. Trim the seam, press open.
Pin Bib Facing to Bib, right sides together. Stitch Facing to the Bib, starting from lower notch on the Facing to lower notch on the other side.


Clip corners (left). Grade the seam allowances so that they are graduated in height and the shortest layer is closest to the body (center). Clip seam allowances along the curve (right).

If you have a point presser, this is a good tool to use it to press the seam open before turning the Facing right side out. This makes the edge along the seam much easier to control once you’ve turned the Facing right side out.


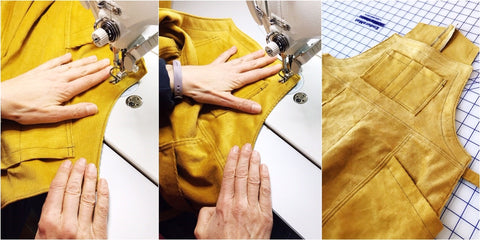
Edge stitch the seam from lower notch to lower notch.

Top stitch the Bib approximately 1" from the edge as shown, starting at the waist and stitching to the waist at the other side.
Now we can attach the Back Button Plackets. With the right sides together, stitch the top edge. Then turn them right side out. If your fabric is not too bulky, you don’t need to clip the corner (left). Just fold the corner down and hold it in place pinched between your thumb and your forefinger as you turn(center).

Press and serge the bottom edge. You can serge the sides at this time like we did or you can also wait until you attach the Placket and serge the sides along with the Pants.

If you haven't done so yet, mark the notches on the Placket (left). Center photo shows the notch at the side opening. Match the lower notch on the Placket with that notch at the bottom of the side opening (right).

Match upper edge of Placket with circle at waist (left - the circle is marked with a tiny awl punch that doesn't show in the photo. Just note that top edge of the Placket is offset from the corner by 5/8"). Placket pinned in place at side opening (center). Stitch between the lower notches and the circle at the waist edge. Press all the seams towards the back (right).

Stay stitch the curved back edge right along the seam line. The stay stitching is in matching thread so it is not easy to see but it is there.

Prep the Back Facing pieces exactly as you did the front, trimming the interfacing and fusing it to the corresponding pieces (left). Finish the inner edge (center). Mark where the back princess seam will match the facing (right).
Pin Back Facing to the overalls right sides together matching the reference marks and notches (upper left). Stitch from circle at waist edge of facing - the location of the circle is the pin (upper right). Grade the seam allowance in the same manner as the Bib Facing (lower left). Clip the curve (lower right).

Press the seam open (upper left). Turn under the seam allowance at the short end that abuts the Button Placket (upper right). Turn the Back Facing to the inside and press (bottom row).

The Back Facing will look like this after pressing:

Edge stitch the facing (left). Topstitch 1" from edge securing the Facing in place on the inside (center). The back edge is finished now and will look like the photo at the far right.

Let's finish this installment up with anchoring the Button Placket and Bib Facing to the overalls.
Lap the front edge of the waist opening over the Button Placket and pin the opening shut as shown (upper left). Pin the bottom of the Bib Facing and the Button Placket in place . It makes it easier to deal with if you hand baste everything at this point (upper right). Mache Stitch through all layers at the level of the lower notch anchoring the Button Placket and the Bib Facing to the side front trousers (bottom row).

You made it through another long installment!! All that is left now is the Straps and the finishing steps. Join us next time!
Click here for the next installment in the sew along.
Ophelia Overalls Sew Along Part 2: Set Up and Sew February 13 2019 2 Comments
Click here for previous installment in the sew along.
In spite of the multiple (and maybe a little finicky) elements of design in this pattern, it is a fun sew! If you have a serger, you can speed up the sewing time by pre-finishing the edges. Here's a quick guide regarding the edges to serge and which you can leave raw. Serged edges are highlighted in red. Serge at the raw edge leaving your 5/8” seam allowance in tact.

The remaining non-serged edges will either be enclosed in a facing or will be finished with along with additional edges as the construction progresses.
If you don’t have a serger and are zigzagging or using some other method to finish your seams, it’s no problem! Just use your desired finishing method as you progress.
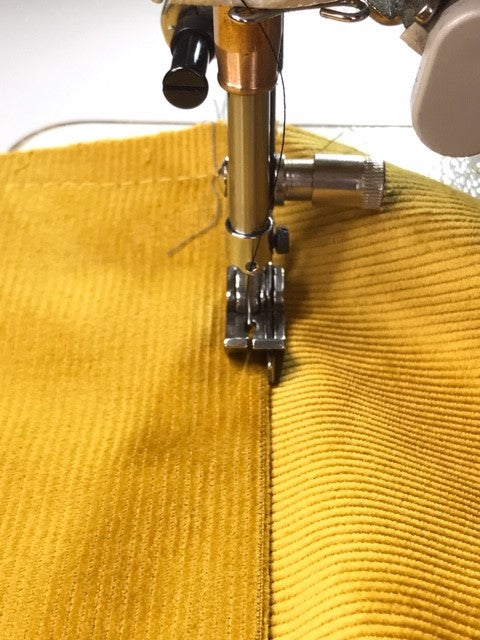
For any of you who might happen to have an extra (possibly vintage) sewing machine lying around (or maybe even a collection of them), this is the perfect time to set it up with contrasting top stitching thread if you are going with that option. Gratuitous vintage sewing machine photo below:

Let’s sew!
Stitch Side Front and Side Back Pants together at the side seam leaving the seam open above the notch indicated. Press that seam open. (Just a note ahead of time that there are limited "at the sewing machine" photos. And please forgive the color variations in the photos. The lighting as well as the fabric made consistency a challenge.) This photo is pressing open the seam after stitching.

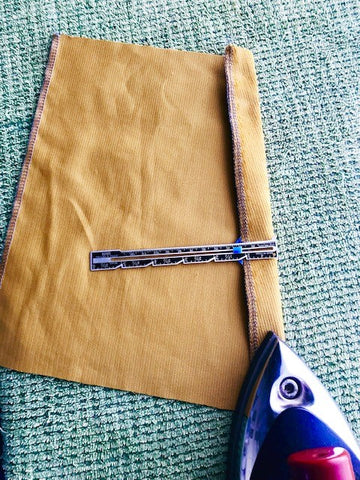
Stabilizing the top edge of the Pants Pocket will prevent it from stretching out as you wear the overalls. This is particularly important if you’ve chosen to cut this pocket on the straight of grain as opposed to the cross grain. A quick strip of fusible interfacing along the fold line will do the job. Pressing on a towel to try to preserve the pile on the corduroy (right side images).

Turn down along the fold line at the top.
Turn up the seam allowance on the bottom edge and press.

Stitch 7/8” from top fold.

With all the pieces facing right sides up, align the bottom edge of the pocket on the Placement line. Baste the sides of the pocket in place.

Edge stitch and top stitch along the bottom edge of the Pocket. You will be stitching on the cross grain on the pants and on the straight of grain on the pocket. These two different grain lines often have different amounts of “give” to them so hand basting or aggressive pinning is recommended.

If you have a little shift of the pocket and the raw edges no longer align at the sides, don’t worry about it as long as the Pocket still falls in the 5/8” seam allowance, you’ll be good. You can see at the lower left hand corner of the pocket, it shifted and there is about a 1/4" gap to the side. It worked out fine in the end.

Now it's time to make the Side Belt pieces. You should have enough extra fabric to make a test piece if you have any doubt whether your fabric is light weight or not. We used the light weight fabric construction for the back belt but ultimately we should have gone with the heavy weight construction. So-it’s worth a test!
Here's a tip for the light weight fabric construction. After you trim 1/4" off the edges and press in 3/8" along each side (top row photos), you can stitch the short ends together, clip the corners and turn it to finish that short edge (bottom row.)

Otherwise, if you are using heavier fabric, turn in 1/4", then 3/8" and stitch the folded edges down the middle of the belt piece.

Place one of the belt pieces in the position indicated below the waist notch (left) and baste it in place (right.)

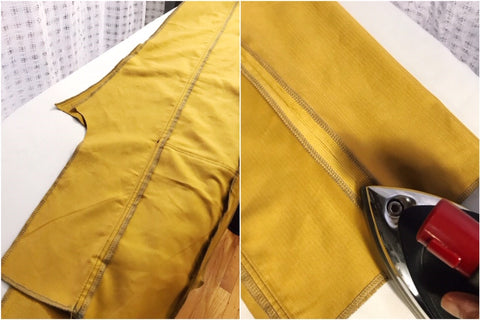
Stitch the Center Front Pants to your side assembly right sides together. Pieces next to each other (left). Seam stitched (center). Trim seam allowance Side Front trousers (right).

Press the seam allowances all towards the side assembly (left). Edge stitch and top stitch on Side Front to create the faux flat felled seam (center). What it will look like (right).

Repeat step with the Center Back Pants. Pieces next to each other (left). Seam stitched (center). Seam allowance pressed towards the side assembly (right).

Edge stitch and top stitch Side Back Pants (left). Finished seam (right).

Stitch the inseam right sides together and press seam open.
Turn one pant leg right side out as shown. Then slip it inside the remaining pant leg that is still inside out. Your crotch seam should align perfectly with the right sides of the fabric together.

Clearly mark corner of the seams at the center back - it is the SQUARE on the pattern piece (upper left). Stitch the seam ending at that Square on the center Back Pants pieces (upper right). Clip seam allowance on where the crotch curve breaks in the front and back (lower left). Finish seam between clips (lower right). If you are not using a serger, trim the seam between the clips to 3/8" and finish as desired.

Press the seams open above the clips.

Phew! Are you still reading? Congrats! Your trousers are assembled. Next time we will assemble the Bib and attach it. See you then!
Ophelia Overalls Sew Along Part 1: Fabric and Fit February 13 2019 1 Comment
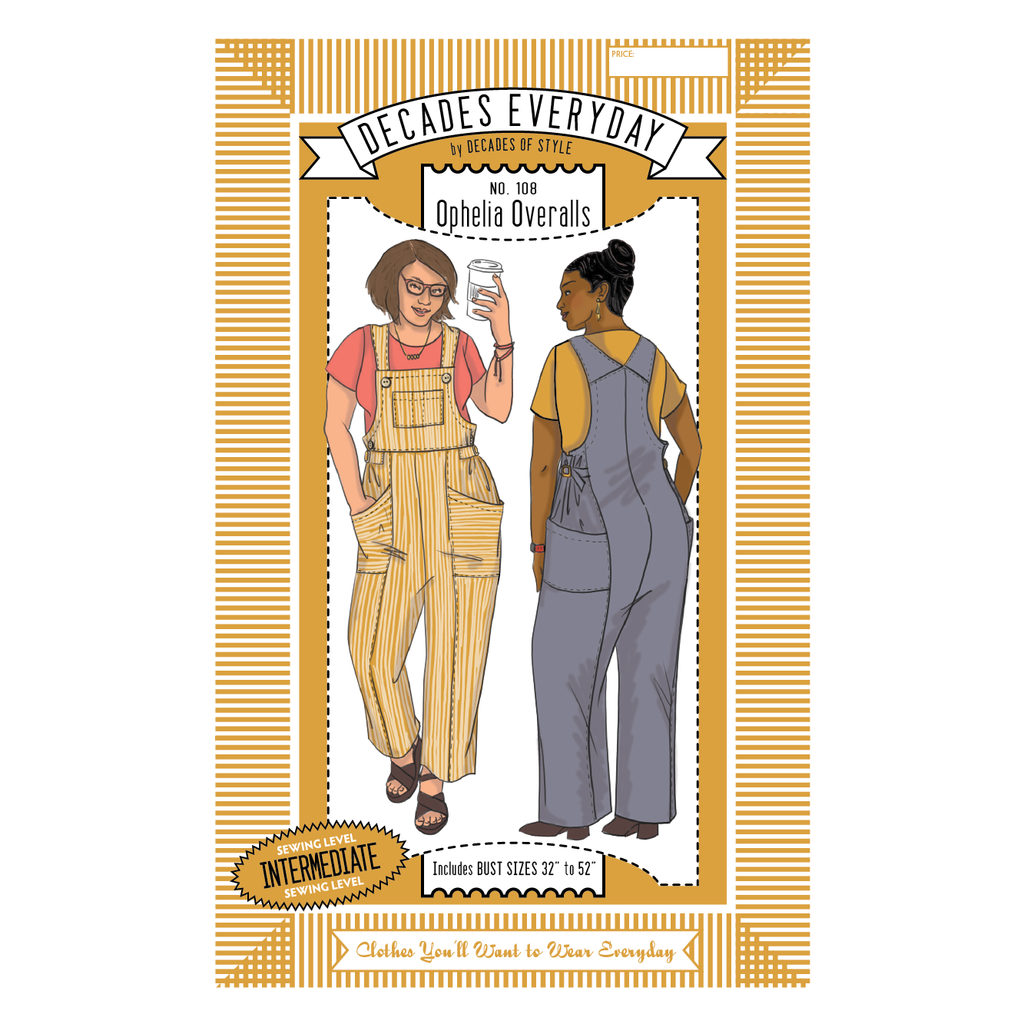
Hi all! Welcome to the Ophelia Overalls Sew Along! This is just going to be an introductory post covering fabric choice and the fit of the pattern so we can hit the ground running next time in the construction.
The main thing to keep in mind when selecting your fabric for this project is to avoid anything too heavy or too bulky! Look for a bottom weight fabric that is either mid to light weight and has a stable weave.
It all sounds a little bit wordy but that’s what works best with this pattern. You need something substantial enough to be considered a bottom weight fabric (something that can handle that abuse sustained by pants) but it can’t be super heavy. No heavy weight or super bulky denim or canvas. The construction uses a faux flat felled seam so there are places where you are stitching through quite a few layers. If your machine has the clearance and the pressure to handle 4-6 layers of heavy bulky fabric, then no problem; but many domestic machines will struggle with that load. So keep this in mind.

The suggested fabrics are: Stable bottom-weight woven fabrics are suitable. Avoid very heavy weight fabrics. Light weight denim, twill, light weight canvas, poplin, gabardine, corduroy.
If you are going to choose corduroy, a smaller wale is best. And it might be a good idea to get a bit extra in case you want to play with how you cut that trouser pocket. We used a 14 wale for this sew along and it was lovely! (14 cords per inch).

If you want to go with a lighter weight, looser weave fabric like a chambray or linen, it will work fine but you will most likely need to support the straps by using a double layer of fabric or flat lining the strap pieces with something stable like muslin or quilting cotton.
And speaking of the trouser pocket, it is cut on the cross grain in the pattern. It is a big, awkward pattern piece so if you desire the pocket on the straight of grain, purchase extra fabric (1/4 yard extra should do it). A striped fabric is a very fun choice because of the princess seams and the possibility to play with the grain line! We rotated the grainline on so many pieces in this sample, we can't really keep track of it all.But just look at the result! Purchase extra fabric if you want to play around with rotating the pieces.

Let’s talk about the fit now. These overalls have a very relaxed fit! There’s 5" of ease in the hip. That’s a lot of ease but not overwhelming.

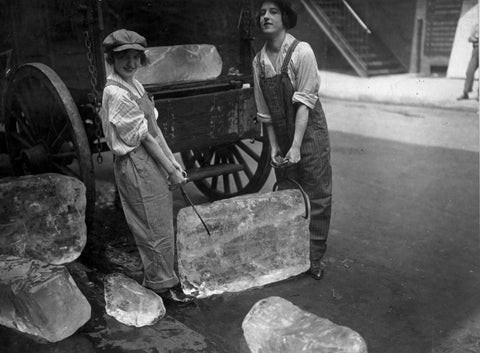
That much ease preserves a vintage look from both the early century (as shown in this WW1 era photo of ladies delivering ice) and later into the 30s and 40s.


If your body measurements fall between sizes, using the smaller size will be fine. A number of our pattern testers decided to go down a size from what their body measurements corresponded to. This will result in a closer, more modern fit. You’ll end up with 3" of ease in the hip which is standard. Kathe's overalls are fitted with very little ease and they look great!

Just a reminder that this pattern has been drafted for a B cup. If you need to make adjustments because your cup size is much larger, your options are lengthening the straps and/or making the bib taller and wider as you desire. On this particular pattern, it’s not very scientific - it just means a bit of trial and error work with scrap fabric.
Whatever adjustments you make to your Bib, make the same adjustment to the Bib Pocket and Bib Facing! It is a smallish space and the Pocket to Bib proportion gets thrown off very quickly!
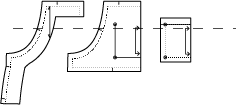
Lengthen or shorten on dotted line for Bib, Bib Facing and Bib Pocket.
The best way to make your decision which size you prefer is to make a muslin! We really recommend making a muslin! Making a muslin is the best way to address fitting issues and achieve a finish garment that is successful! In summation, we really recommend making a muslin! Seriously though! We can’t emphasize enough how making a test version will save you time and money in the end and help you achieve the best results possible.
Click here to purchase the pattern.
Okey-doke! See you next time where are the sewing will commence!