Click here for previous installment in the sew along.
All that is left is the Straps and a number of finishing items - so let's get 'er done!
If you have used a loose weave or light weight fabric for your overalls, you will want to flat line the straps with a stable weave fabric like muslin or quilting cotton. Just cut Straps pieces from the muslin or quilting cotton. Stack the muslin Straps on the fashion fabric Straps, wrong sides together and baste them together around the outer edges. Procede with the construction treating the stacked pieces of fabric as one layer.
Narrow hem the unnotched edges of the Straps. Turn in a scant 1/4” and press, then turn in 3/8” and press. Edge stitch close to the fold.

Next, you’ll attach the Strap to the top of the Center Back Pants. The Straps should meet precisely at the center back at the square on the pattern pieces (upper left). Stitch with the pieces right sides together, matching notches (upper right). Serge or zigzag the seam together and press seam down (lower row).

Edge stitch and topstitch on the Center Back Pants, catching the seam allowance in place on the inside of the overalls.

Time to attach the front Belt.
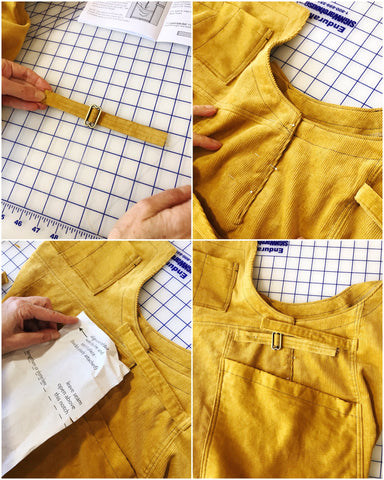
With the remaining belt pieces, thread your buckle or D rings through about half way (upper left). Work with the side vent pinned shut (upper right). Place the finished end of the Belt at the placement line and pin temporarily (lower row).

Thread the back Belt through the buckle and positioned the buckle so that the back Belt just reaches through the buckle (upper left). Mark the location of the buckle on the front Belt (upper right, lower left). Unthread the back Belt and unpin the front Belt from the overalls (lower right).

Cut off the front Belt about 1” past the mark for the buckle (top). Finish the cut end (middle). Fold that end to the underside of the Belt and hand stitch in place keeping the buckle at the designated location (bottom).

Underside of Belt and top side of Belt (upper left). Pin the front Belt on the Side Front Pants aligning the free end with the Belt placement line (upper right). Stitch in place (lower left). Voila (lower right).

OK - Now for all the finishing stuff. We have some tips to speed it along.
Try the overalls on and pin the Bib to the Strap so that the waistline of the overalls is right at your natural waist. We are working on a dress form, so this photo shows her waist (top row). On the Strap, mark the top of the overalls (bottom row). Now you can take the overalls off.

Fold the Strap in half lengthwise and mark that center line along the fold. Mark the center of the button location on the center line. For a 1" button, mark the 1" below the line indicating the top of the Bib.

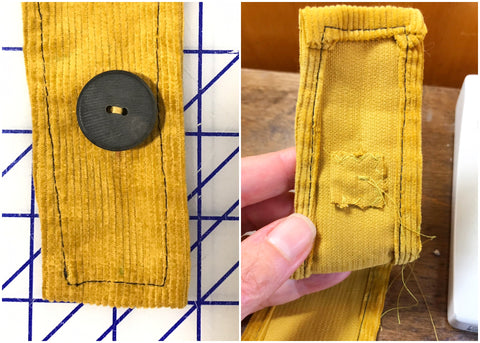
Take a small scrap of fabric aproximately 3/4" by 1 1/2" and fold in half, right sides together. Zigzag around the perimeter (top row). Baste this square on the wrong side of the strap centering it at the button mark (bottom row).

Sew the button on the right side of the Strap through all layers of the patch on the wrong side. (If you have anything other than a 1 inch button, you will need to adjust the button location on the Strap. A larger button will be a bit further down the Strap.)

Make a vertical button holes in the upper corners of the Bib. The distance from the side of the Bib is half the width of the Strap at the location of the button (left). The top of the buttonhole should be 7/8” the top of the Bib and 1 1/8” long for a 1” button (center).

Make a horizontal button hole on the Bib at the waist line. Start buttonhole 7/8” from the edge of the Bib and center it in the area above the waist as best as possible. Sew on button for waist.

With the Button Placket pinned as shown (upper left), mark snap locations spacing 3 snaps in the area under the button (upper right). We sewed the buttons and on with the machine using the darning foot, stitch width of 4 and a stitch length of 0. Using the same stitch settings, we attached the male half of the snaps to the Button Placket knotting the loose threads securely afterwards (bottom row).

Sewing the female snap goes pretty quickly if you double thread your needle. Take a fairly long length of thread and fold it in half. Thread your needle with two strands of the thread (top row). You now have four strands of thread going through your needle and will only need to stitch twice through each attachment point on the snaps (bottom row)
 .
.
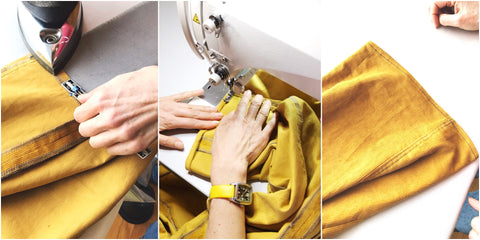
A 5/8” narrow hem is allowed on the pant legs. Turn up 5/8", turn the raw edge into the fold and press. Machine stitch hem.

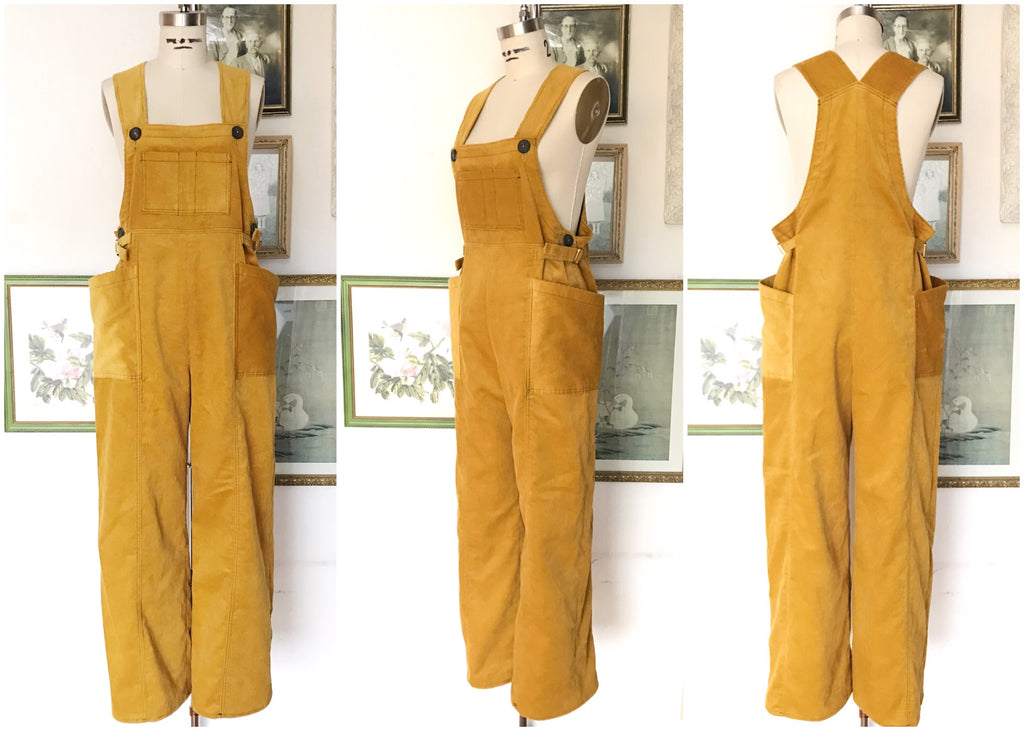
Now you have the cutest pair of overalls on the planet!

Thank you so much for sewing along with us!

