News
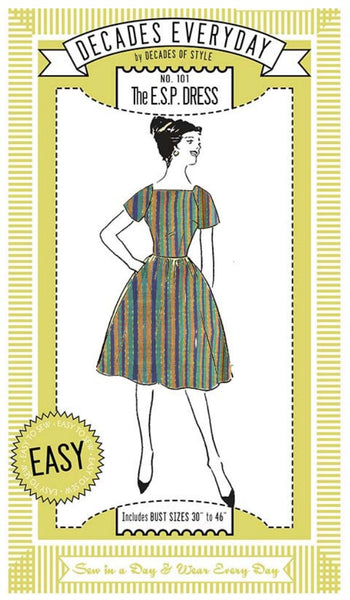
E.S.P. Dress: Getting It Done July 26 2016 1 Comment
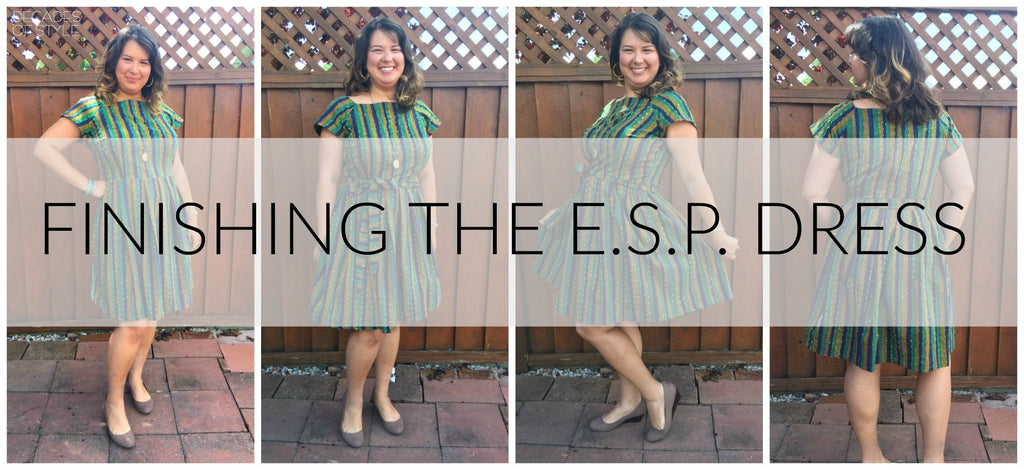
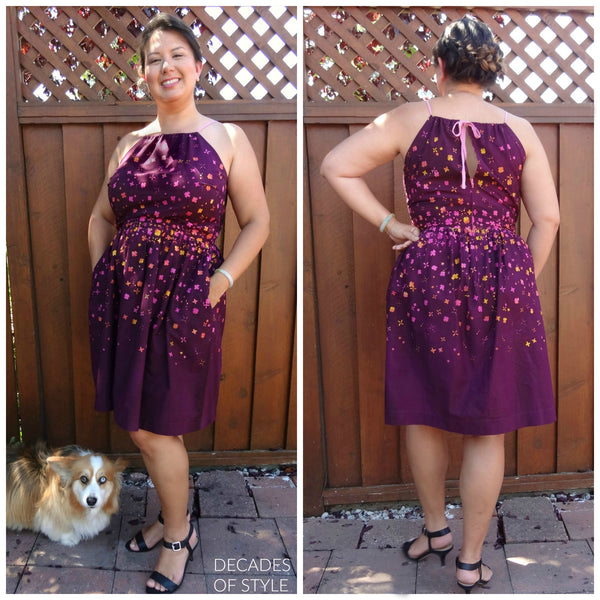
Just when you were thinking the E.S.P. dress was going to be an eternal UFO (unfinished object), here is the last installment of the sew along. We could go on and on about the fun things you can do with the E.S.P. dress, but we released a new pattern, the Cats Cradle dress, and we want to get to that sew along as soon as possible. Lets run though one more pattern adjustment that you can make and a few details of finishing the E.S.P.!
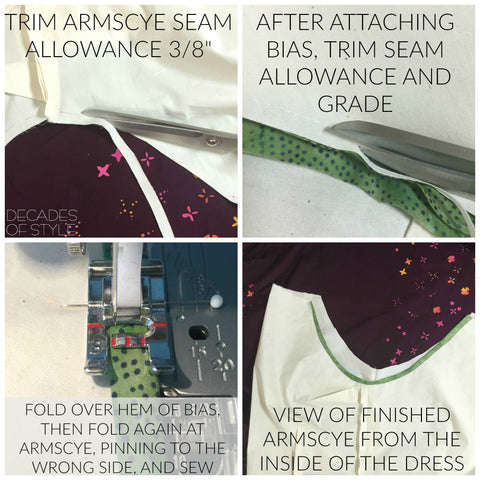
Sleeveless E.S.P.
A bit more work but a fun alternative for hot summer days. You will not be needing the bodice facing pieces for this adaptation.
Things you need:
1 yard of 1" wide bias. We prefer to make our own bias as purchased bias tape can be hard to manipulate. Feel free to use some fun contrasting fabric as no one will see it... unless you want them to.
2 yards of 3/8" - 1/2" ribbon or make your own tie.
Cut the bodice front and back with an additional 3/8" at the top of the neckline. Stay stitch the armscye a scant 5/8" from the edge.
Sew your bodice darts, attach the skirt to the bodice front and back. Measure 9" from the top of the bodice back down the center back and clip into the seam allowance, about 5/8" (to the seam line). Turn in the seam allowance 1/4" then again 3/8" and sew down. Or, if you have a serger, overlock the center back seam and turn and sew it down. The zipper will now start 9" below the neckline. Insert the zipper to the center back.

Trim the armscye seam allowance 3/8". Now, fold the free edge of the bias about 1/4" and press (the pressing really helps here). Attach the bias, right sides together using a 1/4" seam allowance, to the armscye, trimming any excess at the ends. Grade the seam allowance of the bias. Then turn bias along the seam line toward the inside of the bodice and stitch 1/8" near the fold. Need a super detailed tutorial on this technique? Victory Patterns has a lovely tutorial on bias finishing edges which can be applied to making a sleeveless dress.
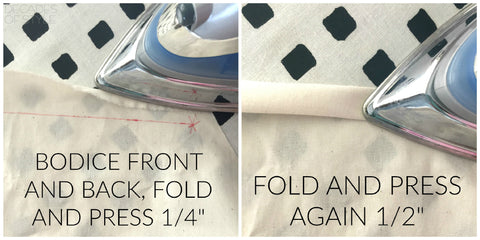
Fold and iron neck line of the bodice front and back 1/4", then again 1/2", pin and sew down, sewing a scant 1/8" from the hem line. You have just made your neckline casing.
Now thread the neckline casings with your ribbon having it start and finish at the center back.
Finishing Your E.S.P. Dress
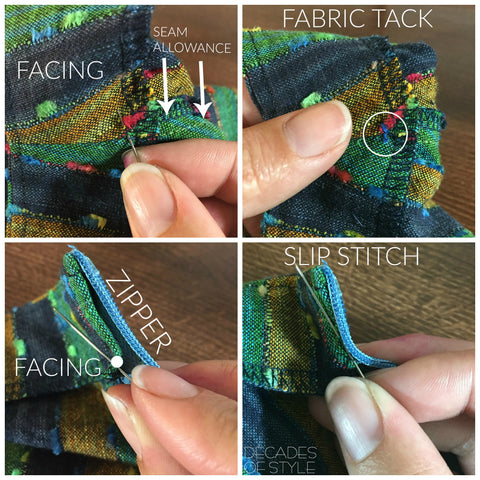
If you are finishing the dress without any adjustments, you'll be attaching the facings and hand tacking them to the seams. While some find facings fidgety, we like the vintage technique of hand tacking. You could hand tack them all around, using a prick stitch if you really don't like loose facings. Using a slip stitch to sew down the facing at the zipper make the stitching invisible.
Hemming the skirt is simple as it is all straight (no fussy curves here). The E.S.P. is meant to be hemmed 2" for a 23" skirt. You are welcome to make it longer or shorter as desired.

To accessorize, we made a sash from our leftover fabric. Check out Tanya's tutorial on making a self fabric belt at the Curvy Sewing Collective. Also, check out gMarie Sews' tutorial on lowering the neckline if you like to show a little bit more skin. We'll come back to the E.S.P. dress in the future to show some other fun pattern adjustments but we REALLY want to get to our newest pattern the Cats Cradle dress and the fabulously easy trick to sewing its lovely ribbon cage work!
Cheers!
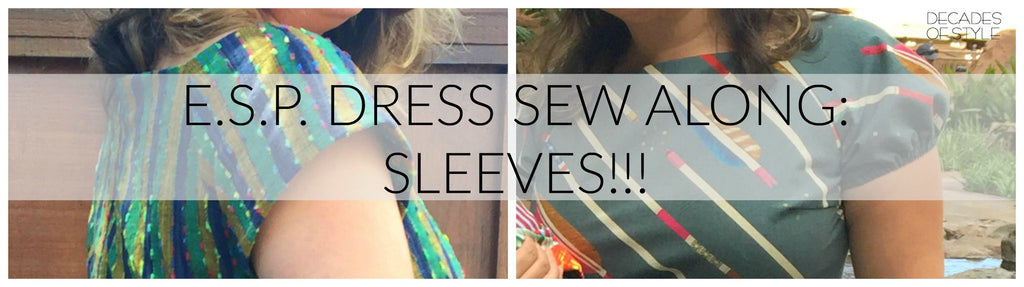
E.S.P. Dress Sleeves: Sleevie Wonder June 22 2016
Okay, starting to get a hang of this writing thing.
Now that the bodice is fitted and the skirt is gathered or pleated to your liking, we can get the sleeves done. The E.S.P. dress has slightly flared raglan sleeves that hit about mid bicep. Tanya, from Curvy Sewing Collective, looks AMAZING in this length of sleeve. We LURV all of the E.S.P. dresses she has made.
You may find that you want a different sleeve for a slightly different look. Here are some options.
Shortened sleeve
Our model found the sleeve length did not work with her proportions (she felt it made her bust seem wider). So, to let the bust "stand out on its own" (her words) we pinned up the sleeve to a length she liked (about two inches shorter).
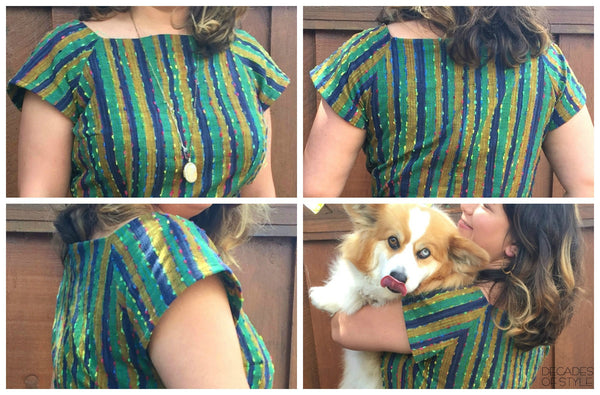
(Gratuitous photo of adorable corgi a blatant an attempt to increase readership)
We then transferred that adjustment to the pattern so that she will always have a shortened sleeve option.
Elastic band sleeve
If you like the sleeve as it is but want an easy change, try adding elastic to the sleeve hem. We used a 1/4" elastic cut to 1 inch larger than the bicep measurement (14") and used a 1/4" seam allowance (don't sew the ends together yet). If the elastic is too tight, you're feel like you've got a tourniquet on your arm, so test the band to make sure its comfortable.
Iron the sleeve hem up 1/4".

Now, iron the sleeve hem an additional 1/2". Pin and sew the hem close to the folded edge leaving 1" on either side of the side seam.

With your casing all but finished, attach a small safety pin to one end of the elastic and draw it though the casing. Sew the elastic ends together with a big zig-zag stitch. Finally, sew down the 2" of the casing at the side seam.

You now have a slightly gathered sleeve.

(Glamorous movie star scarf and sunglasses enhance the awesomeness of this sleeve option)
Next time: Cap sleeve and sleeveless
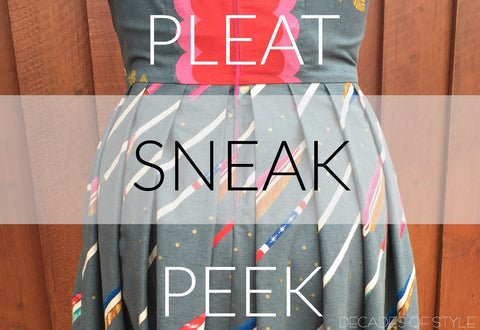
E.S.P. Sew Along: OK Pleats For Real This Time June 01 2016
Okeedoke. Onto the topic of skirt fullness and pleating. The E.S.P. pattern has a skirt softly gathered at the waistline a ratio of 2:1 fullness. This means for every one inch of the waist measurement, there are two inches of skirt.

Gathering the skirt at the waistline creates a certain amount of bulk depending on the ratio and the heaviness of your fabric. To achieve the luxurious look of a fuller skirt without added bulk at the waistline, PLEATS! Pleats might have a bad rep for being harder to do than straight gathering. And yes, there are more steps to the process but it is TOTALLY doable even for someone newer to sewing.
Our preferred fullness ratio for a pleated skirt is a 3:1. To get this number, we measure the waist edge of bodice front after the darts are sewn and minus the seam allowance, and then multiply that number by three. For the Skirt Front on the size 40 we need a piece that is 19" x 3 or 57" wide. For each Skirt Back, we need pieces that are 10" x 3 or 30" wide. For the length, you can work from the pattern piece (it is just at or above the knee so if this is too short for your taste, use the skirt length from a pattern you like.)
We cut our Skirt Front piece at 57"x 25" and our two Skirt Back pieces at 30"x 25" each. Next, we transfer our skirt markings (pocket position on the side seams and zipper position on the center back seam). We will be doing one direction knife pleats, but there are lots of pleating options. The Yellow Spool has a very clear tutorial on three different pleats: knife, inverted box and box.
For this dress, we made fewer pleats that are fairly deep. This is not a surgically precise way of making pleats. But it doesn't matter because no one will be measuring the pleats on your dress when you are finished. The goal is to make them appear uniform. If they are off by 1/8" or 1/4," it won't be noticeable. If free wheelin' gorilla pleating sets off your OCD, then the math version is to divide the waist front measurement by the number of pleats you want (this gives you the depth of each pleat.) Repeat for the back using an even number so you can have the same number of pleats on either side of the center back zipper.
Laying out the skirt front (right side down), we first marked the seam allowances.

Measuring from the seam line, we place a pin at the distance our our chosen pleat depth of 1 1/2" (Pin A), followed by a pin at 3" (Pin B) Repeat this configuration all the way across the Skirt Front piece and the two Skirt Back pieces.
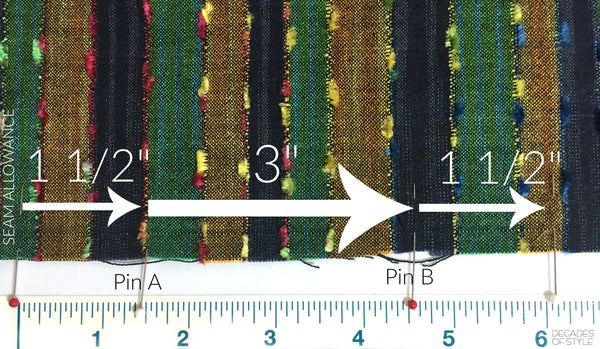
When you bring Pin A to Pin B, you will get a knife pleat that is 1 1/2" deep.

The pleats should abut one another with no spacing between.

There was a bit of unpinning and redistributing to get the fabric worked down to the waist line but any unevenness is not noticeable.

Other gathering and pleating options:

From left to right: 2:1 gathered, 3:1 gathered, 4:1 box pleated (too much fabric to gather), 3:1 pleated changing direction at the Center Front (box pleat) and Center Back (inverted box pleat).
Next up: Sleeves!
E.S.P. Dress Sew Along: A Week Late And Not About Pleats May 17 2016 5 Comments
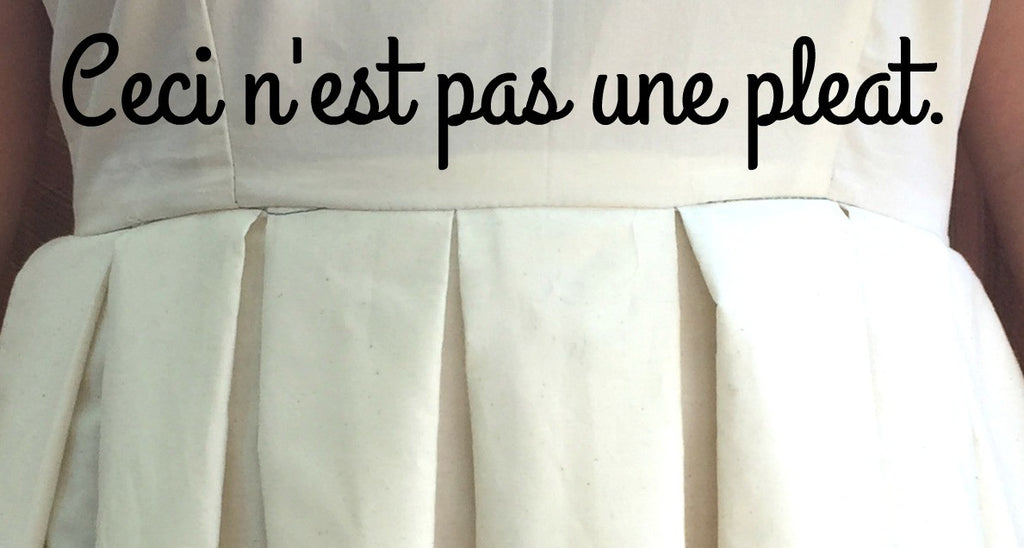
Art history nerd joke mash up of Magritte and pleats for the header image. Apologies to the art sensitive!
Man! This "blog voice" thing is tricky! Last week's post really had an overwhelming "Wah wuh. Wah wah was wuh." feel to it. That's the teacher from Charlie Brown in case you couldn't tell. The teacher from Charlie Brown is not the voice we want so we'll keep working on it.
We said we were going to talk about pleats in this post but we lied. We're going to talk about cutting your pattern on the cross grain instead. Here we go!
Our fabric has stripes running perpendicular to the selvage (aka railroaded stripes). Cutting the pattern on the straight of grain would give us a horizontally striped dress. Our model said, "Um. Nope." to horizontal stripes, so we'll cut on the cross grain.


The biggest difference between the cross grain and the straight of grain is the cross grain has more "give" to it. You can see for yourself by pinching two points on the cross grain and stretching it slightly. Try it again of the straight of the grain and you should see a difference. The cross has more stretch; it should bounce back, as the "give" is due to the tension in the threads when it is woven. Threads has a very informative article on changing your grain direction for different design effects as well as a detailed article on how grain lines "behave".
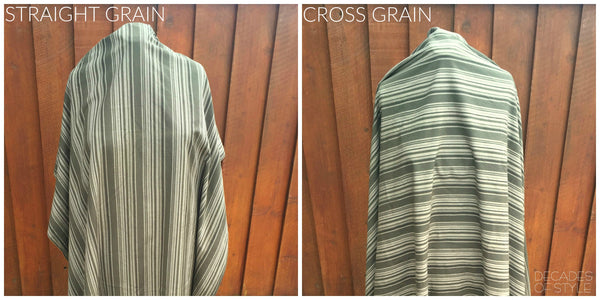
You can see the difference between the two. The drape of the straight of grain is softer and falls closer to the dress from. The fabric draped on the cross grain holds a shape further out from the dress form. Some recommend increasing the circumference of your garment by an inch if you are cutting on the cross grain. It all boils down to personal preference and the specifics of your fabric and pattern. You might notice a garment cut on the cross grain feeling a bit constricting across the back and shoulders.
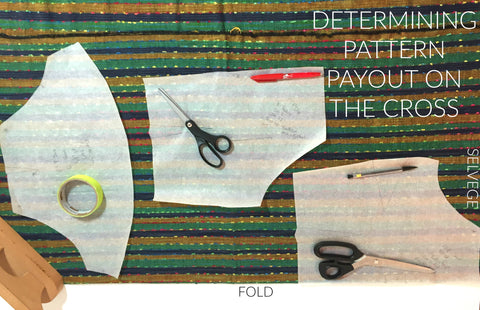
Our fabric has an unusually stable weave and there is actually not much difference between the cross and straight grain regarding "give" and drape. So for this project, cutting the bodice and skirt on the cross will have little affect to the drape and fit of the dress.

Ok. We're still figuring out how to pace things so we'll end it here this week. Next week, we'll talk about increasing the fullness of the skirt and how we gorilla pleat the skirt.
Cheers!
E.S.P. Dress Sew Along Week 1 May 04 2016 2 Comments
First off - progress report on the search to establish the "voice" for our blog. Er...no actual progress made on that front. We are fast giving up hope of every nailing this down entirely.
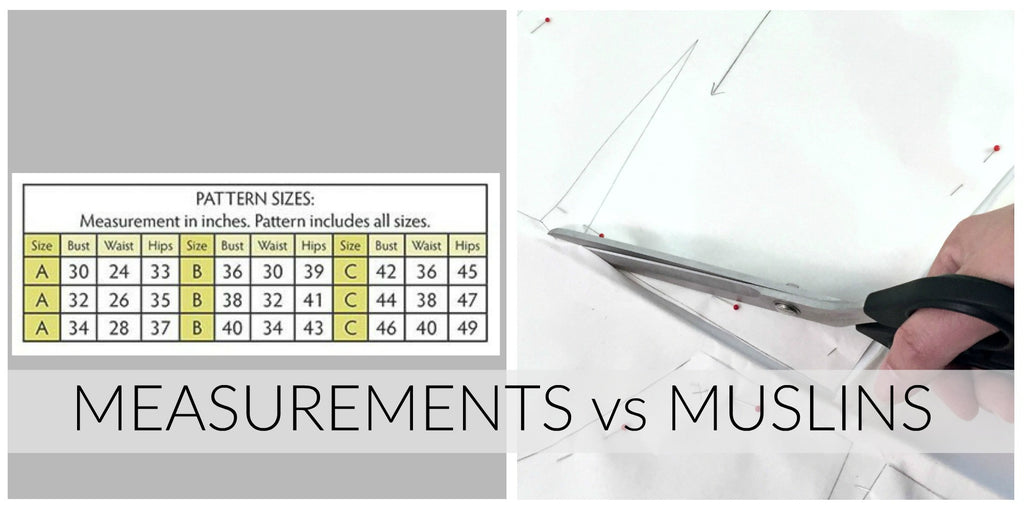
So - on to the sew along part! The key to making the E.S.P. dress look beautiful and feel comfortable is a well fitted bodice. A muslin, also known as a mock up or toile, is our preferred way of determining what changes have to be made to the pattern, if any, to ensure a proper fit. Yes, this does delay the gratification of finishing the dress for a while, but it is SO worth it! A properly fitted dress is a revelation. You will feel amazing and proud as you say "This beautiful and comfortable dress? Oh yes, I made it."

BEFORE YOU CUT, CHOOSE YOUR SIZE.
Our model's measurements are Bust 42", Waist 35", Hips 45". At first glance, it appears that the size that best matches those measurements is 42 (our sizes are labeled based on bust measurement). But our model is a DD cup so this changes EVERYTHING! Our patterns are sized and graded based on a B cup, as is the majority of commercial sewing patterns. If your bra cup size is a C cup or larger (regardless of your band size) you will most likely need a Full Bust Adjustment (FBA) to make the bodice fit properly. If you your bra cup size is LARGER than a B – use your high bust measurement to select your size and go from there.
The FBA is positifvely magic as it adds exactly what you need, where you need it to fit your curves. And believe it or not - it is EASY. If you have no pattern adjustment experience, don’t be scared. Check out our favorite FBA tutorial at the Curvy Sewing Collective (whom we love love love, BTW, and you will too when you see all of the amazing information and body positive posts). They make understanding and learning the FBA so easy and clear. Adding the FBA to your sewing skills will be life changing – we kid you not! If you prefer having someone talk you through it, look at Sewing Parts Online's video. It also covers a Small Bust Adjustment (SBA), which helps those with an A cup get rid of a baggy bodice. Need to do a SBA? Use your bust and waist measurement to select your size. There is a written tutorial on the SBA by DixieDIY.com which is very helpful.
As per the FBA guidelines, we selected the pattern size based on the model’s high bust measurement, 40” . Then we did the FBA on the size 40. We placed the sleeve piece over the bodice front to determine the shoulder and mark a point 1/3 of the way down the armscye for the FBA.

Besides adding the fullness to the bodice, now is the time to move the darts to correspond with the bust apex. Again, we'll defer to the Curvy Sewing Collective for a tutorial on lowering a bust dart and Itch to Stitch, which covers moving the waist dart, as well.
Below, we have the results of a WHOLE LOTTA muslin sewing! The first and second row of photos show the muslin sewn directly from the pattern with no alterations. The third row is the muslin with all the pattern adjustments.

See the difference? The size 40 is too tight at the bust (pulling at the bust line in front and back). The size 42 fits the bust but the waist and neckline are too big. The size 40 with the FBA fits the bust "like a glove, but on my boobs," to quote our model.
You may notice there is some extra fabric at the lower back. To fit the lower back, we did a Sway Back adjustment. Tanya at the Curvy Sewing Collective (broken, happy record) has a quick tutorial on this adjustment. Also, the size of the dart can be increased to remove the excess fabric from the bust side. And this is why we love making muslins!
Muslins don't require having all the seams finished and facings sewn on. Just put the essential pieces together and try it on.

If you are new to sewing, this is a great time to practice your marking and dart sewing techniques. Check out these tutorials on marking and sewing a dart by Lucky Lucille and Threads magazine (if you prefer videos).
Next week: The pleated skirt variation.
Who am I and what am I doing here?! April 24 2016 12 Comments
Welcome to the inaugural Decades of Style blog post! We've read up on how to blog and we learned the first and MOST IMPORTANT thing about writing a blog is to establish your “voice.” We don’t know what our “voice” is yet so when we figure it out, we'll let you know immediately *wink*. In the meantime, we'll be posting some information about the E.S.P. dress and we hope you enjoy!
Why are we finally doing a blog now after nearly a dozen years in business? We are always late to the party! (Joining social media and offering PDF patterns in the last 18 months - but better late than never, right?) We’ve been having so much fun on Instagram and we don’t want to lose touch with anyone as the app “improves”. We feel this is the perfect time to create a consistent place to share information on a platform that is not vulnerable to the whims of social media algorithms. We are going to show you inspiring pattern variations which are better suited to blog format rather than Instagram or Facebook.

Ah, memories! The first time we were mentioned in Threads magazine. We're in the BIG LEAGUES! And look! It includes pictures of two of our discontinued patterns (a 1920's jacket and 1940's dress). The 1930's Kitchenette Pajamas and 1950's Wrap Blouse are still available.
Our blog will cover basic sew alongs of our patterns as well as tricks and easy alterations to achieve a different look. Our sew alongs won’t cover the nitty gritty of every step in the sewing process. Why? Because the internet already contains thousands of tutorials, videos, articles, and blogs on how to sew a dart, armscye, hem, put in a zipper, and everything else! We'll show you what we do for any chosen task, but chances are it won’t be that different from all the DIYs already out there. Sharing sewing information is great and we'll include links to our preferred and/or wildly different tutorials or informational blog posts that you might enjoy (like have you seen Oonabanoona’s 12 Things I've Learned About Sewing? Hi-larious).
E.S.P. dress with striped and tufted fabric from Stonemountain & Daughter Fabrics
To kick it all off: a sew along for the E.S.P Dress!! We’ll cover how a Full Bust Adjustment really improves the fit for anyone with C cup or larger bra size. We adapt the gathered skirt pattern into a pleated skirt and increase the fullness by 50%. We’ll cover changing the direction of your pattern layout to "on the cross grain" (this will change the direction of the stripe on your finished garment.) And finally, a few words about the sleeve length just for comparison.
So at least we answered half of the title questions! You can subscribe to our blog using the RSS FeedBurner feed by clicking on this text. You can also sign-up to our e-newsletter at the bottom of our page. Look for the sew along to start the first week of May!
