News
Slouchy Witch Hat Pattern Hack for Hilde Hat September 24 2023
We are SO thrilled to have guest blogger Tamsin Eilers of @greenstitchwitch Instagram account giving us her Slouchy Witch Hat Pattern Hack for our Hilde Hat pattern .So without further ado, here's Tamsin!
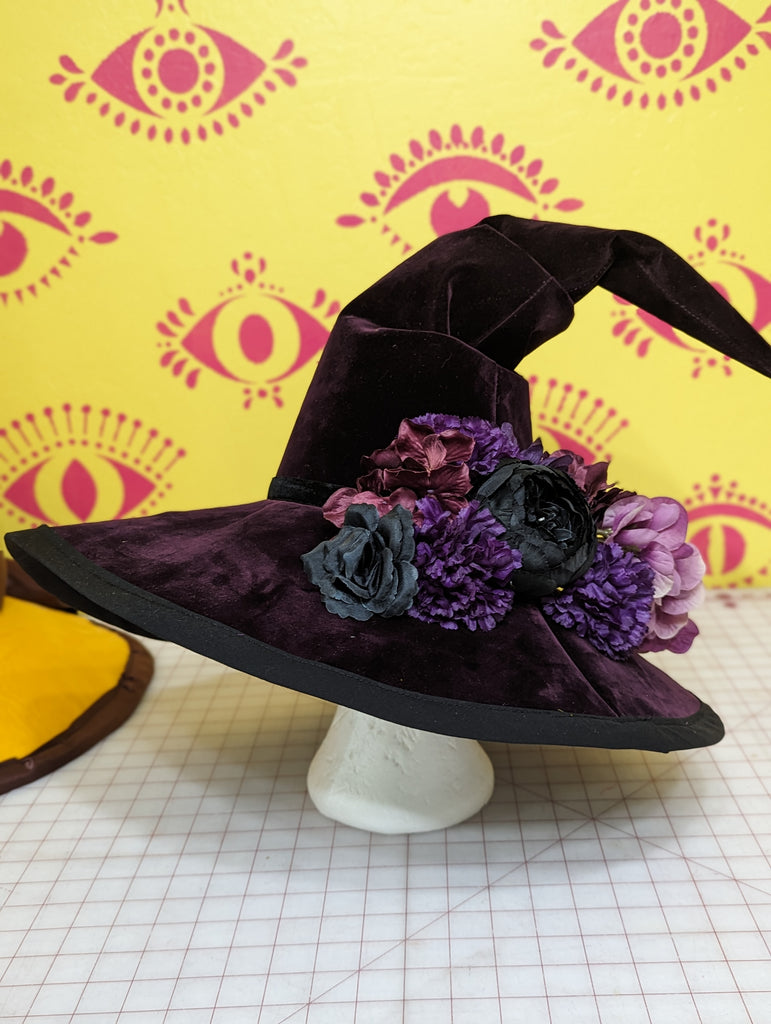
I am a Halloween superfan! There's nothing better than hot apple cider, costumes and scary decorations! From the first moment I laid eyes on the Hilde Hat pattern, I just knew I was going to hack it into a witch hat. I have been on the hunt for *the* perfect witch hat pattern for over a decade! My hunt is over, and this is the only witch that I will ever need. This is a super fast and easy sew, thanks to the pattern!
To get started, you'll need some supplies:-The Hilde Hat pattern-1 yard of fabric (i used flocked denim, and it was the perfect weight)-1 yard of lining fabric-two yards fairly stiff interfacing (you need your hat to stand on its own) I used Pellon #809-chalk or fabric marker-long ruler or yardstick-bias binding (at least 2 yards)-measuring tape-decorations for your finished hat! Fabric or dried flowers, plastic fruits and vegetables, ribbons and lace,the sky's the limit!Start by taking your head measurement and choosing the correct size of the Hilde Hat. We'll only be needing the crown(B) and brim(C) pieces.set your crown piece on the fold of your fabric and use your ruler to draw a line from the base to the fold, creating a long triangle. You can do this on paper to create a pattern you can reuse or draw your chalk line directly on the fabric like i did.


For the brim, we'll be tracing the outside edge to be 2" bigger. Use your ruler to create a dotted line 2" larger than the pattern piece. The inside circle will remain the same.
Cut out your fabric and lining, one crown and one brim each. (Lining not shown.)

Then cut your interfacing. For the interfacing you'll need two crowns and two brims. All four pattern pieces will be interfaced for maximum stiffness.

Next, sew up the cone pieces along the long side, both the main fabric and lining. Attach the cone to the brim (use the instructions included with the pattern), right sides together for both main fabric and lining.turn the lining inside out and insert it into the main fabric piece


Sew the two brims together and attach bias binding following the instructions included in with the pattern.
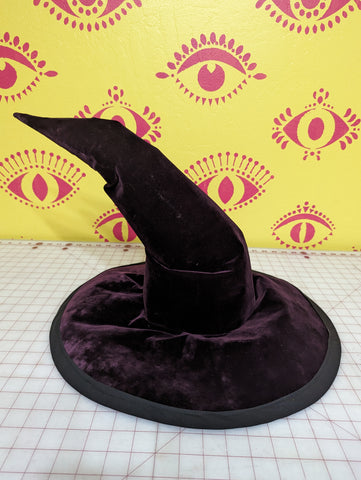
This is the fun part! you can scrunch it up in any way you like! The scrunches will stay in place for the most part, but if your interfacing is very stiff, you may want to tack your folds down with a hand stitch. Decorate to your liking and you're finished!
